


GEPRC Vapor D5 DJI O4 Pro Convert to SBUS from TBS
This is a small tutorial on Changing the Vapor D5 over from TBS system to DJI SBUS system. I document all the steps needed and all the Problems i face while changing over.
Video below is the uncut version. i have a shorter version and just the flight on my youtube.
Step 1
install the new 6 cable wires and remove the TBS receiver cable from the FC board. You should have something that looks like this now.
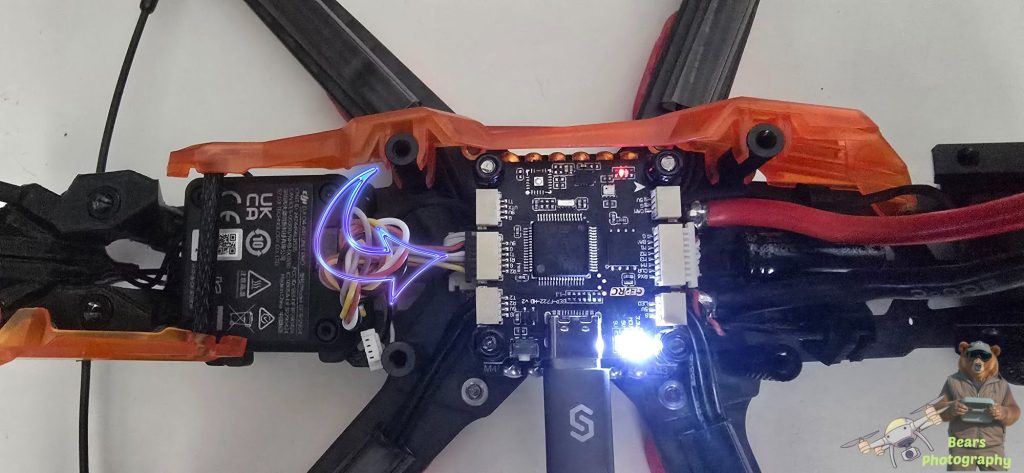
Step 2
This part is important for communication.
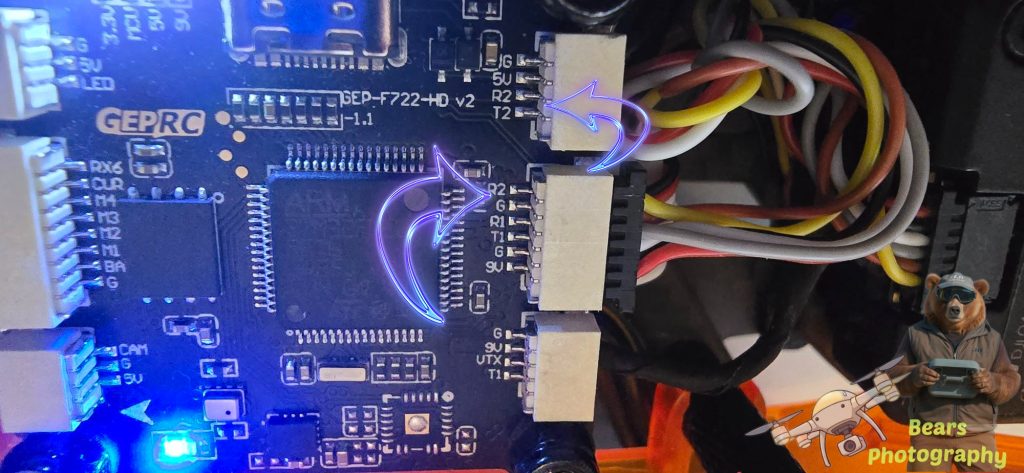
You can see on the FC board the centre plug is for DJI top 2 pins (R2 and G is your uart 2 Connection)
This is why we needed to unplug the TBS plug because if you look at the top plug(TBS was plugged into here) you will see also a R2. These 2 plugged in together with give you interference.
UART 2 is your communication port for the remote.
Step 3
Now you have change the cables over if you have already got betaflight and DJI Assistance Jump to step 4
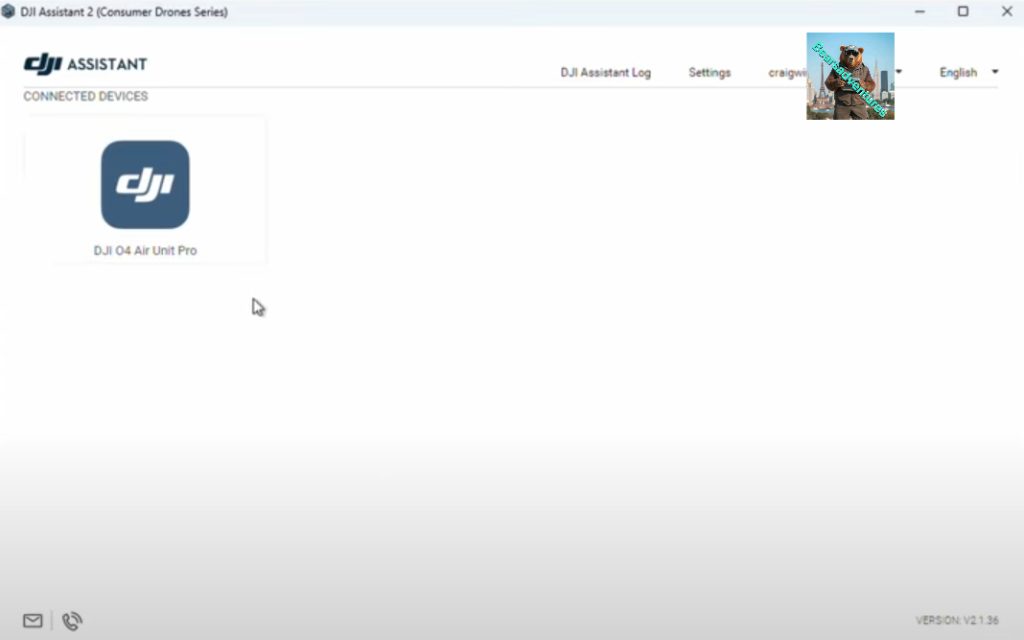
DJI 04 Air Unit
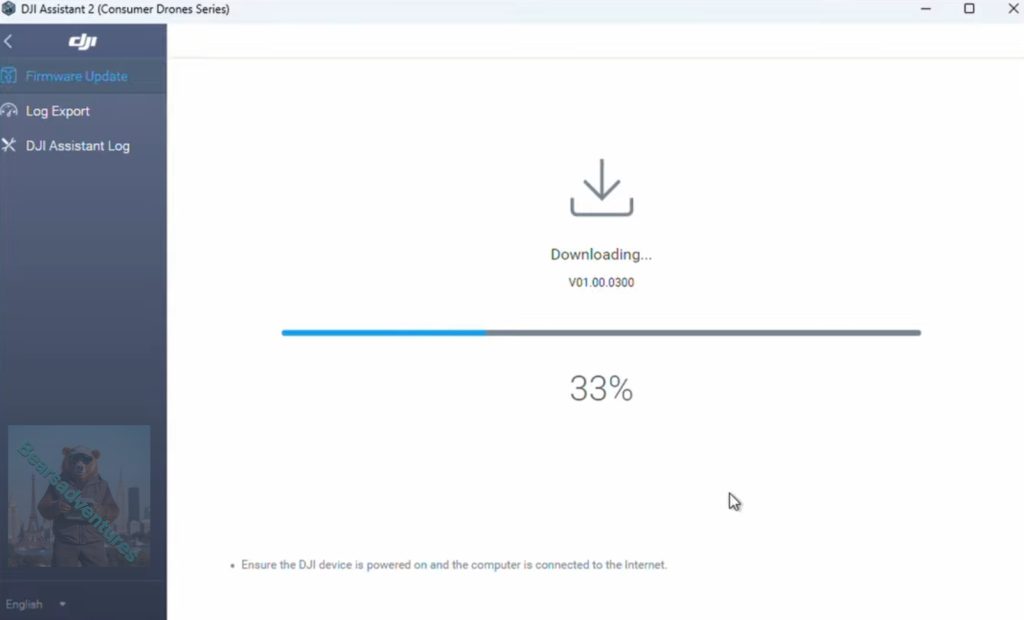
Download the DJI Assistant 2(consumer drones series) and update your air unit before doing anything, activate if needed.
Side tip. You do not need a battery plugged in for this, The air unit will power up off the USB Plug
BetaFlight configurator
Now download the BetaFlight configurator software. Link below to the download page. scroll down to the Assets part for the download files
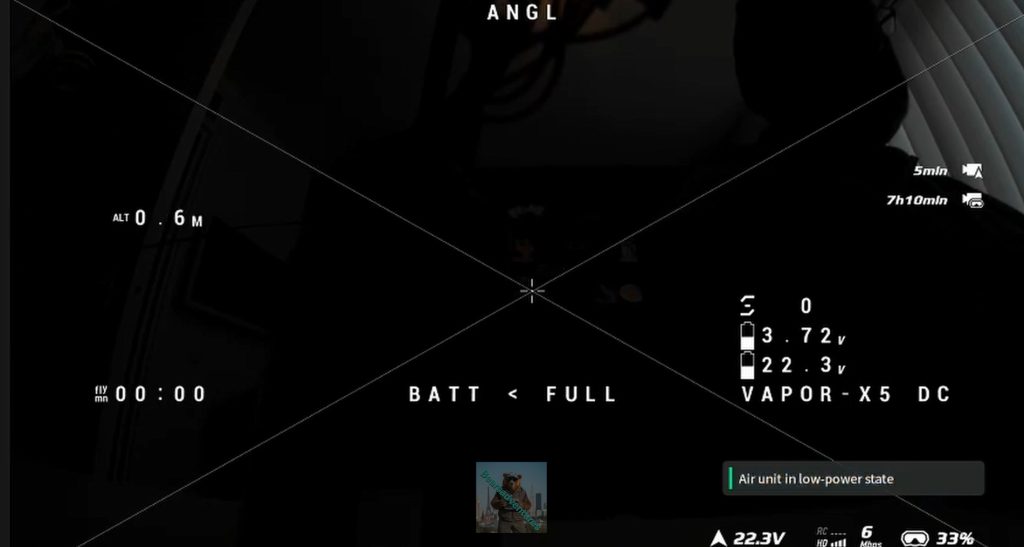
So now i update the DJI 04 Air Unit and Downloaded the Betaflight software, now im going to Bind the 03 Air unit to my 03 goggles. when i have done this i have also binded my remote to my goggles. unlike the V2 goggles where you bind the goggles to the air unit and bind my remote to the air unit. i guess its like this because its cheaper to produce. just be mindful with the version 3 goggles if you loose signal you loose your remote functions aswell.
Under ports in Betalight you should have something that looks like this.
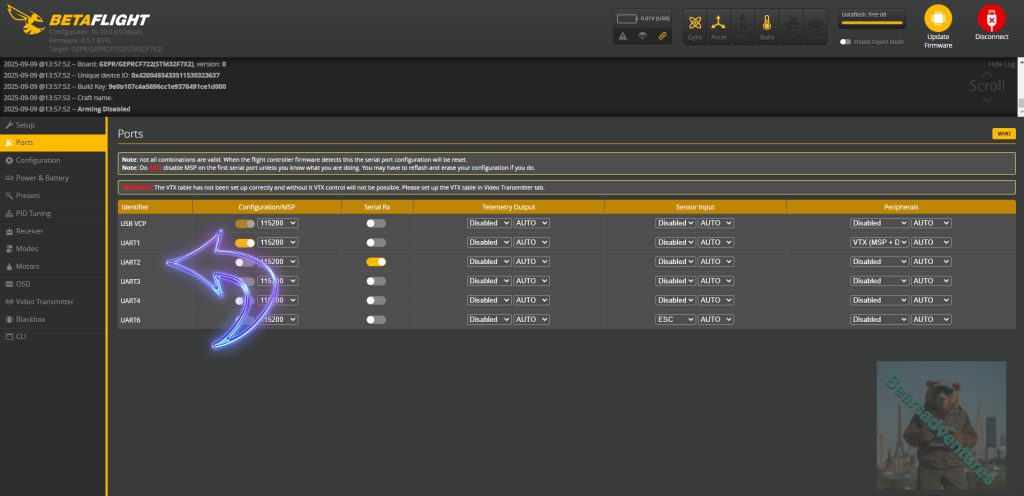
this is the current setup ports. should work when sbus is connected
USB VCP – MSP on
UART 1 – MSP ON (Peripherals VTX)
UART 2 – MSP no Serial RX On
(you do not need to plugin main power for this just the usb cable to the FC board)
Step 4
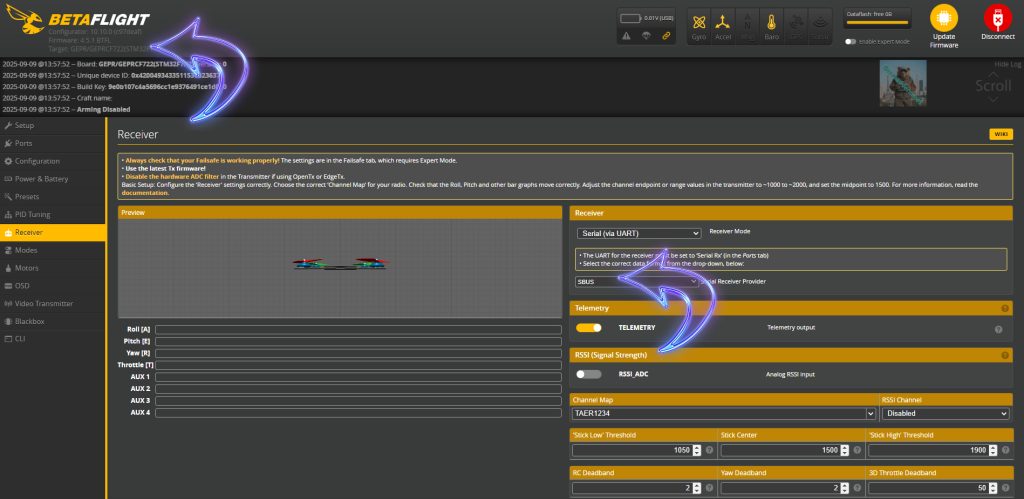
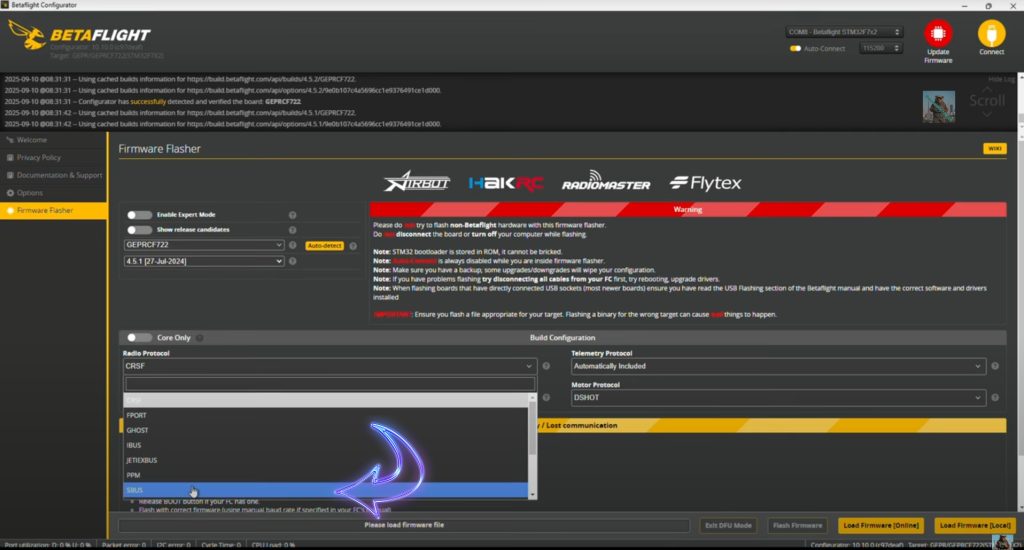
Changed receiver to SBUS from CSRF. Right hand side under receiver. also while you are here make a note of the Current firmware on the FC board, Top left Corner. Select save after you have changed the protocol over.
Step 5
Update firmware, Select auto detects of current firmware and FC board. This will load your FC board and firmware. You can select the drop down box if it not detected your FC board. Betaflight will show the most current firmware to flash to in this case 4.5.2. But my firmware on the FC board is 4.5.1
If for whatever reason the remote will not work after the receiver update. you will need to update the Firmware Radio Protocol to SBUS. this is also the firmware has not got the SBUS part of the software. so by completing this the firmware will change over to Sbus Protocol
(you do not need to plugin main power for this just the usb cable to the FC board)
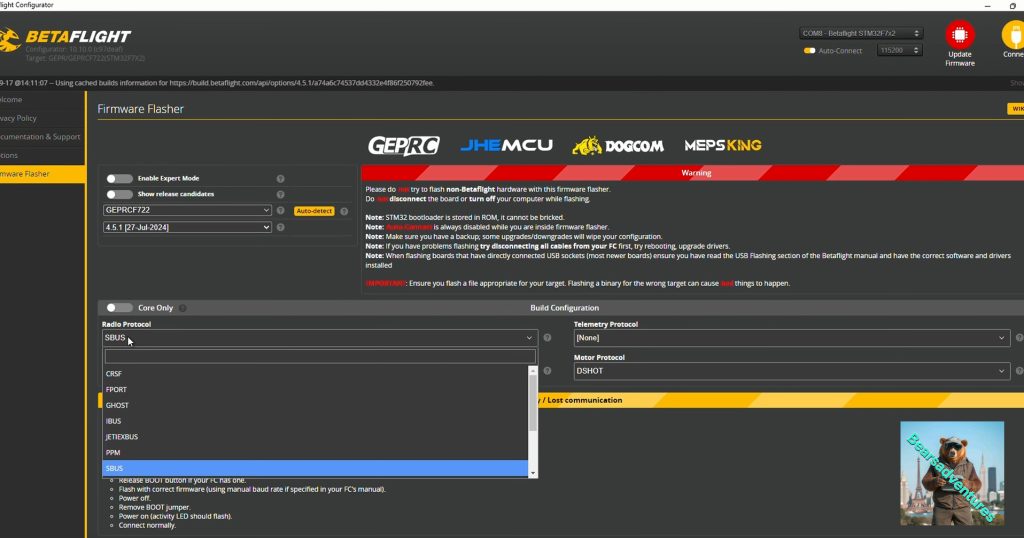
Step 6
Radio protocol is currently CSRF, Radio protocol needs tobe changed over. before the radio protocol is changed the firmware needs changing over to 4.5.1.

Step 7
Now the the firmware is changed to 4.5.1 change the Radio Protocol over to SBUS ready for the firmware flash. this will tell the firmware to store SBUs as the protocol. The reason for this is that the Firmware is so big it will not fit on the FC board memory. so telling the firmware we want to use SBUS. the Firmware will only load the SBUS protocol and not all of the portocols.
Step 8
Now is a good time to bind my goggle and remote to the drone. as you can see no issues here. easy to bind.
on the side of the DJI 04 air unit you will see a BND hole next the the status light. push a pen or small pin into the hole
then keep your finger on the power button of the goggles, they will beep and enter bind mode.
When bind is complete you will get Video feed in the goggles.
remember to select the 04 air unit in the goggles before binding.
(you need to plugin main power)
Side not you will also need to bind your remote with your goggles after you have bind your goggles to the drone.
Step 9
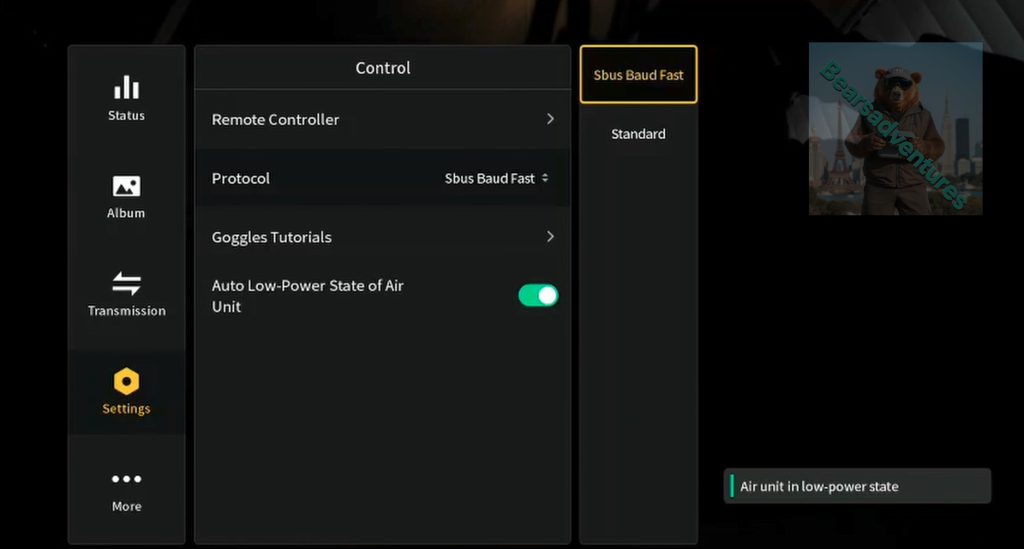
Set your goggles to Sbus Baud Fast under.
Settings / Control / Protocol.
Now move on to step 10
(you need to plugin main power)
Step 10
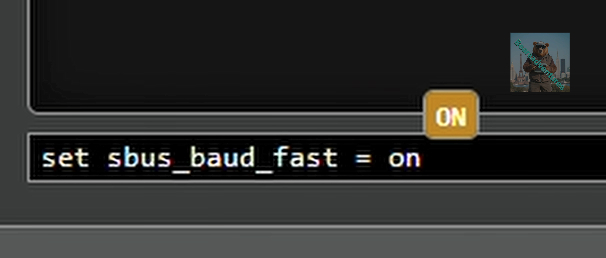
Now in Betaflight under CLI
Type
set sbus_baud_fast = onremember to save aswell.
Type
save(you do not need to plugin main power for this just the usb cable to the FC board)
Step 10
This is a Good Guide Picture for working out your Buttons, Muscle memory is Key here, Because when you are in a Sitaution of stress your brain will do when its trained todo. so if you use lets say the avata series alot like myself. when i get in a sitsution doing a flip i will switch to Sport(S) from Manual(M). so now think of the same situation using this drone you will Switch into Anlge mode and the drone will level off. saved me a few times. so be warned Muscle memory is key here.
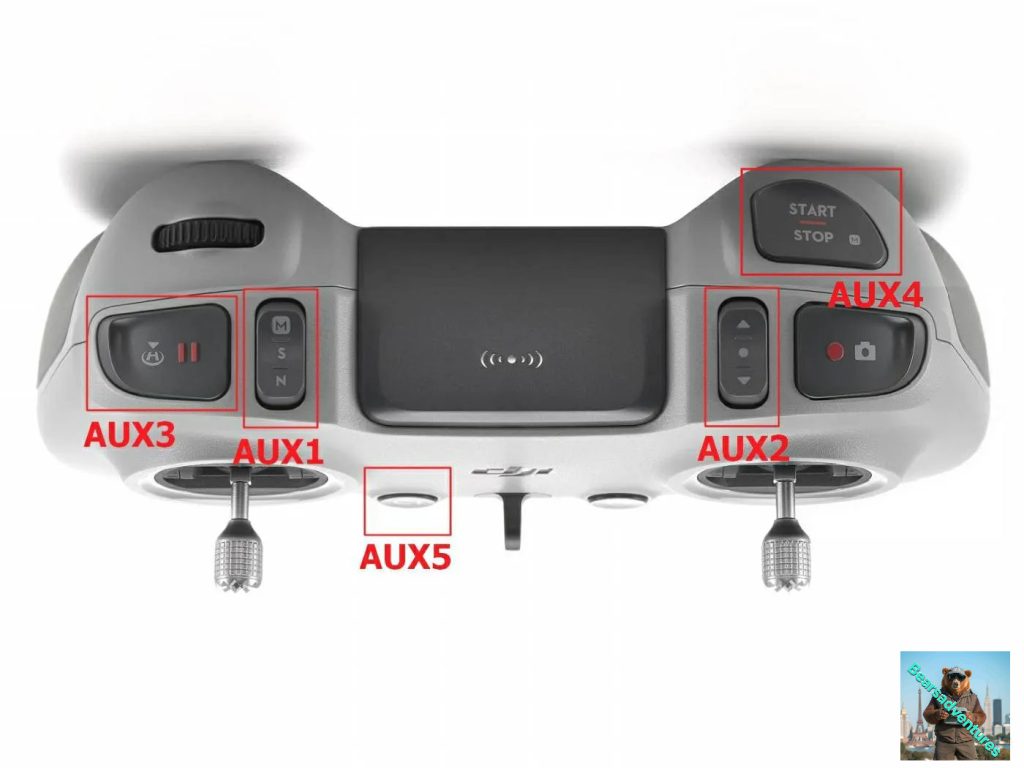

Modes, this section is to setup your remote. the way i setup my remote is as follows
as you look at the remote the buttons on the front of the remote used for N / S / M i want to use this for changing from angle to acro / air. if you select the drop down button in the Angle Section that is AUX1 change this to auto now when you select the button on the remote this will change to AUX1. Thats it set. now i want to use the right button to arm the Quad do the same, Drop down box and select auto, this ended up being SUX2. I Set the Beeper to C1 same process. Aux2. remember to save before doing anything else.
(you do not need to plugin main power for this just the usb cable to the FC board)
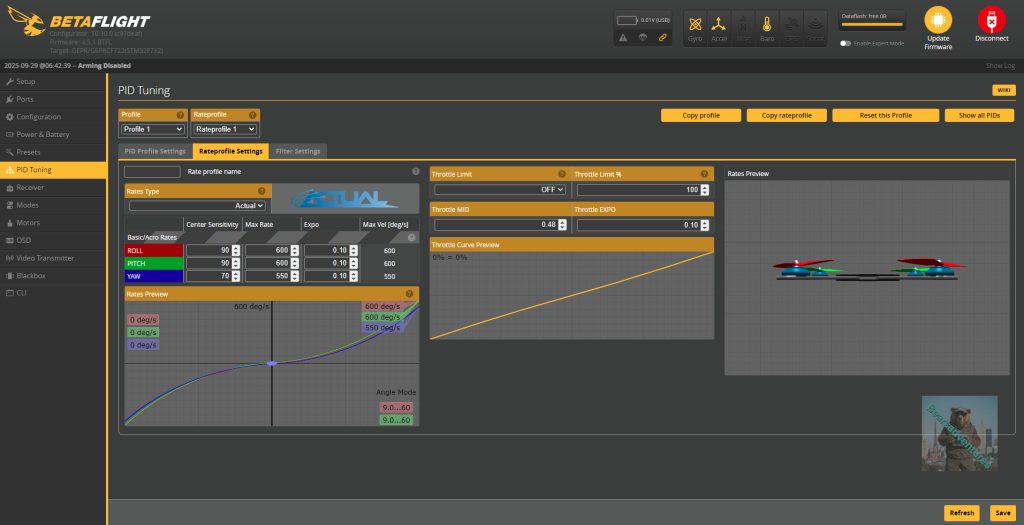
Step 11
PID tuning.
I am not touching just yet. i want to see how the quad flights first
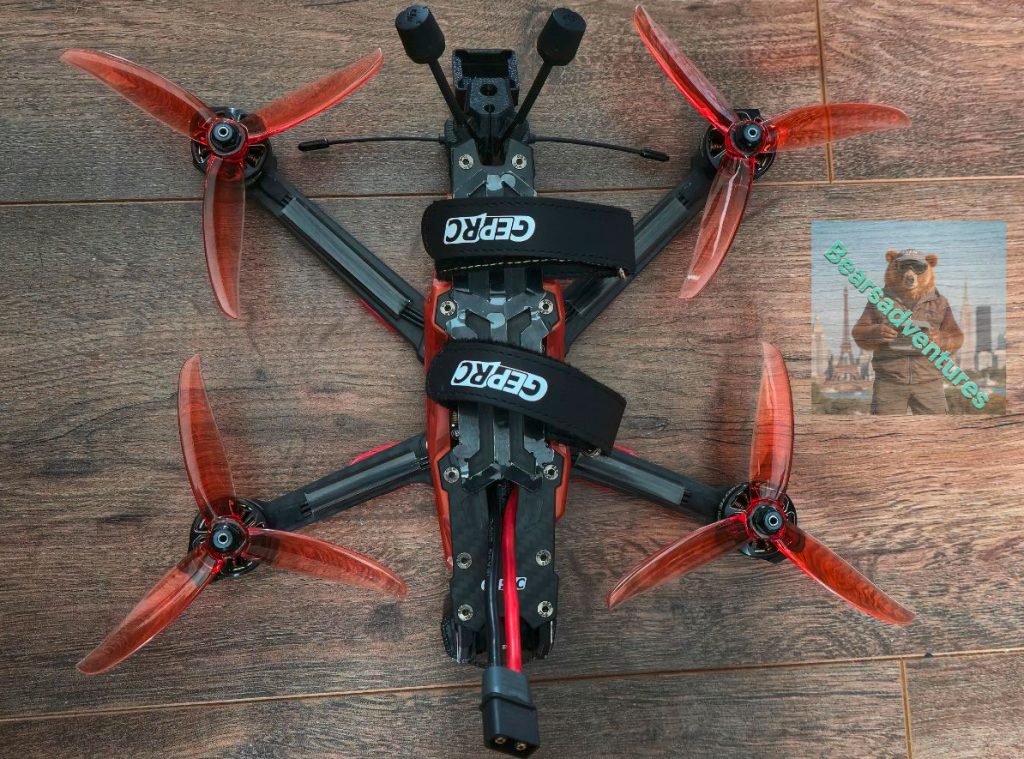
That’s it time to put my propellors on.
If you want to add the SBUS Baud now click below, Im going to go out and give the quad a go first before i do anything else.
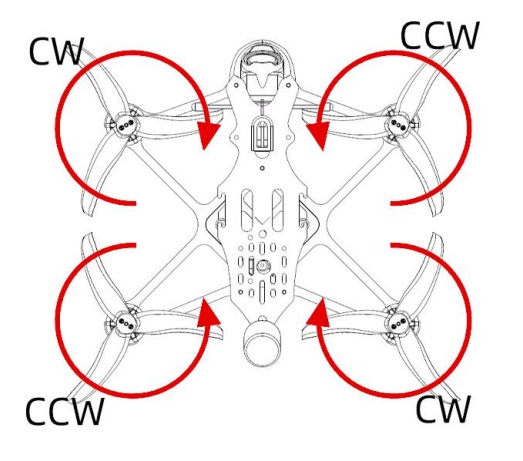
Step 12
Use the diagram and picture of my quad below to put the propellors on.
geprc vapor d5 propellor diagram
you must get this right or you are going to have all sorts of problems when you take off.
Separate your props out and ensure you have 2 sets the same and then place those in front of you how you want them on the quad, this is how i did it to try and stop any mistakes .
Trouble Shooting
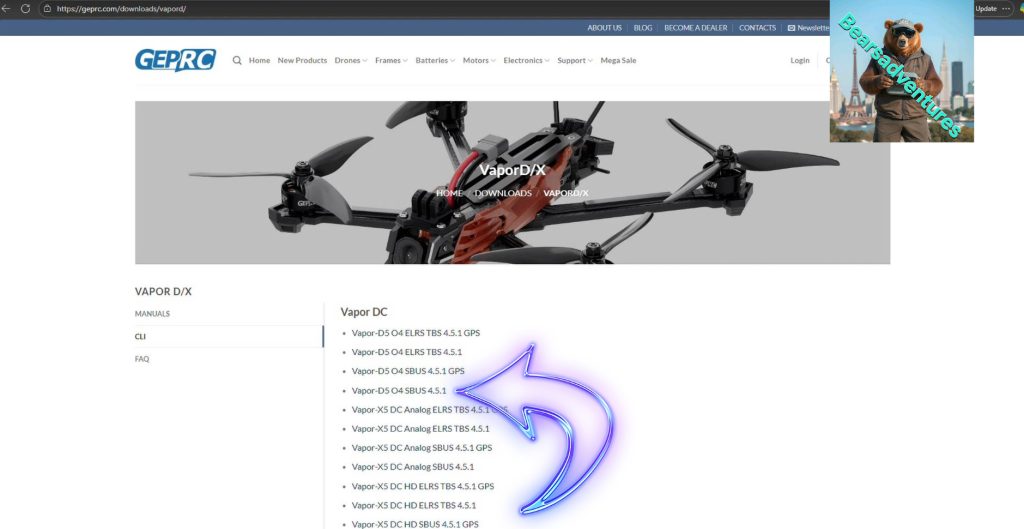
if you need the CLI Factory reset file here is the Link
The files i used to setup My D5
share : https://13ear.uk/9kge